Replacing brake pads on heavy vehicles
 Jean Zart 5 min read
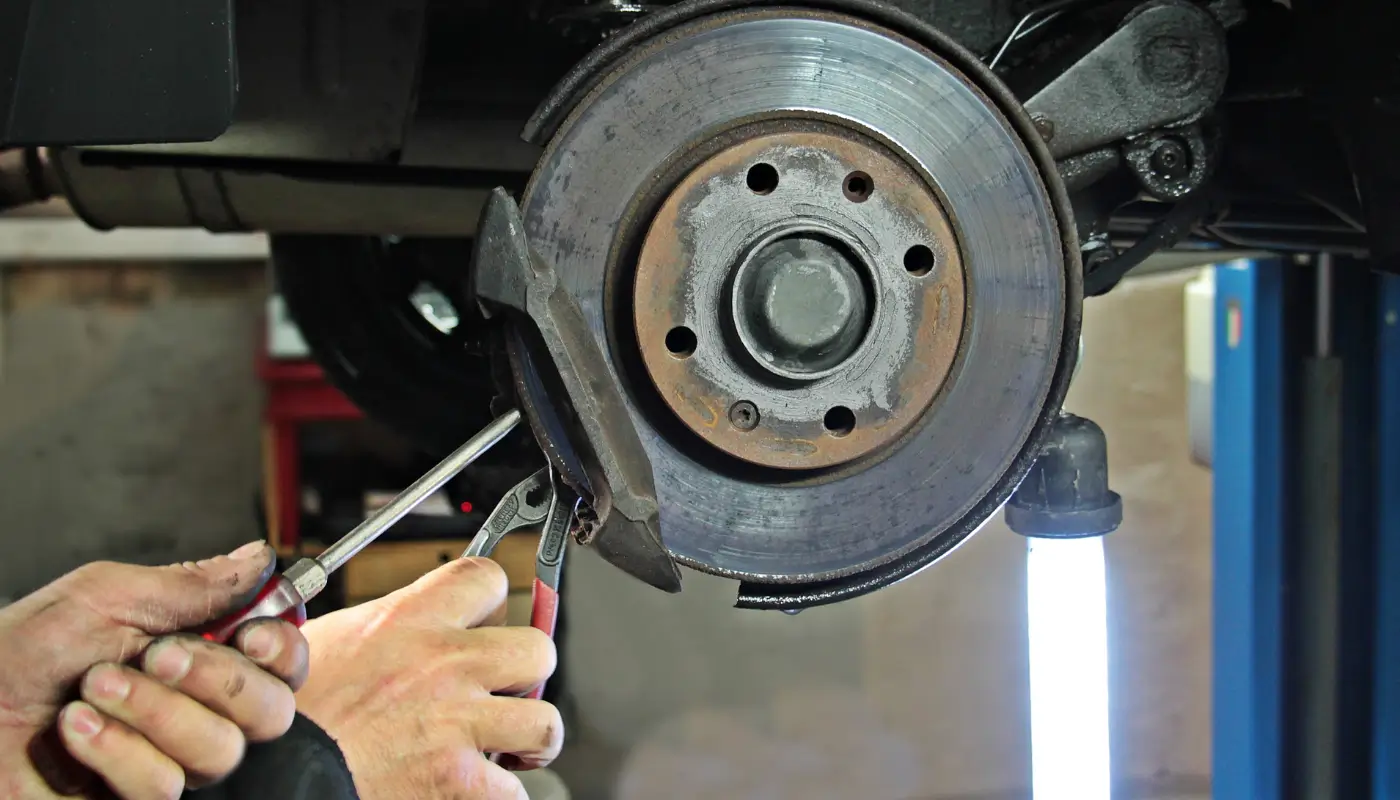
Because of the weight and severe conditions faced by trucks and other heavy vehicles, brake pads are subject to wear and need to be included in preventive maintenance routines. Regular inspection for friction wear helps identify the end of the pads' useful life before they compromise other components in the assembly.
If you need to understand how to replace brake pads on heavy vehicles, use the steps below as general guidance for organizing the service safely, always following the manufacturer's manual, the vehicle's brake system type and workshop procedures:
- Check for signs of wear
- Gather the necessary tools and equipment
- Lift the vehicle safely
- Remove the wheel and access the brake system
- Remove the worn pads
- Install the new pads
- Reassemble the system
- Test the brake system
What are the steps for replacing brake pads on heavy vehicles?
Check for signs of wear
Before starting replacement, inspect the brake pads to confirm the need for replacement. Indicators such as noise when braking, reduced braking efficiency or thickness close to the manufacturer's specified limit are signs that the part may be reaching the end of its useful life.
Using specific tools, such as thickness gauges, can make it easier to inspect the pads and associated components. On air disc brakes, visually checking the pads remains a reliable way to track the assembly's useful life, and measuring thickness helps estimate remaining life.
Gather the necessary tools and equipment
Make sure you have all necessary tools and parts, including the specific wrenches, gloves and safety glasses, and new pads compatible with the vehicle model and installed brake system.
In addition, anyone performing the replacement should always work in a safe, well-lit and level area. Choosing the correct friction material is an important part of maintaining the system's expected performance, and factors such as fleet type, vehicle configuration and duty cycle influence the appropriate pad.
Lift the vehicle safely
Use a hydraulic jack or vehicle lift compatible with the heavy vehicle's weight. Make sure the vehicle is firmly supported on stands or the support points designated for the service to avoid accidents during the work.
Before lifting it, apply the parking brake and chock the wheels that will not be worked on.
Remove the wheel and access the brake system
With the vehicle lifted, remove the wheel corresponding to the brake assembly to be replaced. On heavy vehicles, other components may need to be removed to access the brake system, depending on the design of the axle, wheel and assembly used.
Identify the brake caliper, mounting bolts and mounting type before continuing the procedure. Pads press against the rotor to slow the vehicle, so any disassembly must preserve alignment and correct assembly of the components.
Remove the worn pads
Unbolt the brake caliper and carefully remove the old pads. Pay attention to the original position of the pads, springs, retainers and brackets to ensure the new ones are installed correctly and in the arrangement specified for that system.
Take the opportunity to check the brake disc's condition. If there are deep grooves, irregularities or signs of damage, assess whether the component needs replacement or repair according to applicable technical guidance. Replacing pads as they approach the end of their useful life helps avoid rotor damage.
Install the new pads
Put the new pads in place of the old ones, ensuring they fit properly. Follow the manufacturer's installation instructions, including use of springs, brackets, retainers or fasteners specific to the model.
Before refitting the caliper, compress the piston with an appropriate tool to accommodate the thicker new pads. Avoid improvised solutions: the correct part, suitable friction material and proper seating are crucial for the system to work as intended.
Reassemble the system
Put the brake caliper back in place and tighten all bolts to the manufacturer's specified torque. Then reinstall the wheel and make sure it is secure, following the sequence and torque specified for the assembly.
Test the brake system
Before putting the vehicle into operation, test the brake system in a safe area. Press the pedal a few times to seat the pads against the disc and confirm that the assembly responds predictably, without unusual noise or irregular behavior.
If you notice any irregularity, such as noise, vibration, abnormal pedal travel or lack of response, stop using the vehicle and review the procedure.
Also check that the pedal responds uniformly and does not need to be pressed with excessive force, which may indicate a brake system problem or the need for another inspection. The main point is not to release the truck just because replacement is complete: the final test is part of the service.
What is a brake pad's useful life, and how many km can it travel before replacement?
A brake pad's useful life varies depending on vehicle type, operating conditions, pad quality and the friction material chosen for that application.
On heavy vehicles, the typical replacement interval can vary widely depending on the operation. Rough terrain, very heavy loads, stop-and-start cycles and severe use tend to accelerate wear, while regular inspections allow replacement decisions based on the part's actual condition and the manufacturer's specified limit.
To extend the useful life of pads and avoid premature wear, drive defensively and inspect the brakes regularly as part of preventive maintenance. Regular maintenance can support a more efficient operation and help prevent expensive repairs in the future.
Want to organize your maintenance better and have more control over costs? Download our free maintenance control spreadsheet now and make managing your fleet easier (in Portuguese)!
Frequently asked questions
How do you know it is time to replace brake pads?
What safety precautions should you take before lifting the truck?
Do I need to replace the disc along with the pad?
How many km do heavy vehicle brake pads last?
How do you test the brakes after replacement?
// newsletter
Fleet management content, straight to your inbox
Articles on tires, maintenance and fleet operations. No spam.